Page 1 of 2

#1 My Frugel Mk 3 build

Posted: Fri Nov 11, 2011 12:14 am
by floppybootstomp
Just a quickie cos it's late but I just had to say right now I'm glad I laid out some cash for these things. My oh my, what a revelation. Mark Audio CHP70's in a pair of Colin's flatpack cabs. The tweeters came from Canada, I fiorget details, will look it up (it's late).

Will add more details in near future but just had to say I'm really rather impressed. These have replaced a pair of KEF Crestas on stands. The KEF bass was boomy, Frugels' bass is tighter, more controlled. Imaging is sweet.

It's really taking a lot of will power to limit volume whilst running in.

Anyhow, more details and perhaps some pix soon.

Biggest dilemma at moment is whether to spray matt black as originally planned or coat 18mm ply in varnish as suggested by friend. Decisions.

#2

Posted: Fri Nov 11, 2011 12:45 am
by colin.hepburn
Good luck with them hope you enjoy them my FH1s are a bit of a pain with the fostex 126s I will give them another go next week when the burn in is around the 336 hours

if my FH1s make it in to the system I was thinking of the poor man's veneer should look ok if it's put on right I was thinking of doing the front baffle black and the sides in the Dark Mahogany Wood and with black felt lining the side in the back horn area black base and gold spikes just an option to think about http://www.ebay.co.uk/itm/360391776087? ... 1438.l2649

#3

Posted: Fri Nov 11, 2011 12:34 pm
by Dave the bass
Whahey! Nice one Tony.

Pics!

DTB

#4

Posted: Fri Nov 11, 2011 12:57 pm
by pre65
Well done Tony.

I'd go for a satin varnish myself.(I think)

#5

Posted: Fri Nov 11, 2011 1:06 pm
by Max N
I agree, some kind of clear varnish or acrylic will look lovely imho.
Colin could probably advise what to use. I wouldn't want anything that would add any yellowing to the wood, personally.

Glad to hear they are sounding great as well :!: :D

#6

Posted: Fri Nov 11, 2011 1:08 pm
by Dave the bass
Pebbledash?

DTB

#7

Posted: Fri Nov 11, 2011 1:48 pm
by Toppsy
Hi Tony,

Need some piccies, but well done and hope the kit went together easy. what with the trouble you had with my poor nailed together packing crate. 8) Lessons learned, hey :wink:

By-the-way, the tweeter is the CSS ERT26 which is just a rebadged Mark Audio Tweeter #3. Mounted ontop the FH3's in a postal tube and setup as a Frugal Supertweeter, yes.

As to the finish. Before you start make sure you give the cabinets a thorough sanding. If you don't want to 'yellow' the natural look of the birch ply then any of the Acrylic varnishes will do a splendid job. Just decide whether you want matt, satin or gloss finish. My personal finish would be satin.

Any the Polyurethane varnishes will add a darker colouring and may not be to your liking. They are also harder to apply to get a good even flat finish. Again matt and satin give the best results.

You could also consider adding a stain to the acrylic varnish or buy one of the ready mixed stain varnishes. Just make sure it's acrylic. Or buy a small tin of stain and rub this into the bare ply (after sanding) let this dry overnight and then apply the acrylic varnish.

If you want to paint them then apply sanding sealing first, then undercoat and finally top coat. A lot more work and may need more than one coat, rubbed down between coats, to get a good flat finish.

#8

Posted: Fri Nov 11, 2011 7:01 pm
by floppybootstomp
Thanks for comments all :)

I have varnished quite a few things around Chez Flops and have already decided my preferred varnish is acrylic (water based) clear satin. I use the Wickes stuff, quick drying, nice finish imo.

I had seriously intended to spray them matt black but after looking at them for an evening I have decided to go the varnish route. They have already had a cursory sanding, mostly to remove all the pencil doodlings but they will need a more thorough sanding before varnishing.

The build. One thing came home very strongly to me and I know I'm probably going to state the obvious and repeat what has already been said but - you can never have enough clamps.

Wickes do a good sized clamp for £20.00 and I reckon the minimum required to build a Frugel Mk 3 would be six if one cabinet was assembled at a time. In other words six per cab. That would cost £120 though and unless I was going to be making wooden boxes on a regular basis it would prove to be uneconomical. Somebody should hire these things.

DTB lent me a selection of clamps and I used four of them. Two of them wouldn't fit the entire width of the assembled Frugel Mk 3 so for eah final side panel fixing I used two clamps and an assortment of weights. Far from ideal but I seem to have got away with it.

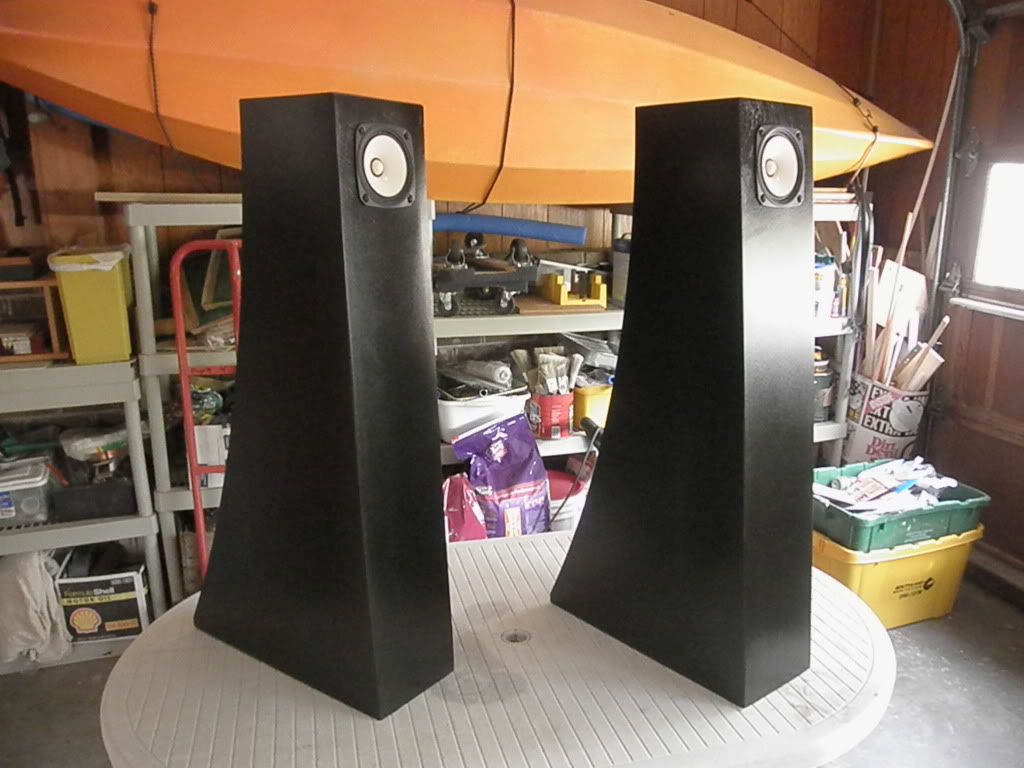
I copied Colin's tweeter enclosure, he very kindly sent me a length of broom handle with the flat pack for their base. The plywood panels from Colin were very very good indeed, fitted together like a dream. The same couldn't be said of their packing though, the courier driver, after delivery, asked me if he could borrow a pair of pliers to pluck several wood tacks from his body after he'd carried it via a lift up six floors. But we won't dwell on that ;)

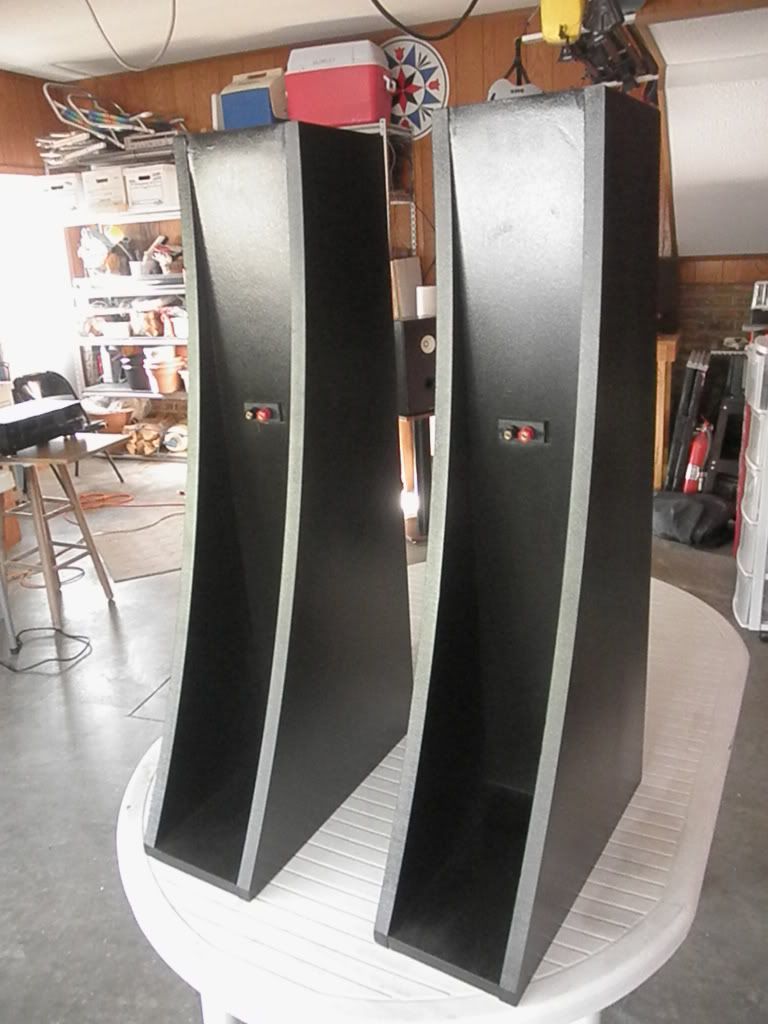
When I first connected the horns for a first listen they had no interior accoustic foam apart from the carpet underlay arround the rear of the driver and they had no outriggers fitted. No tweeter was used either.

Initially I thought I'd made a huge mistake, they sounded awful, almost as if any vocalists were gargling with gravel. I tried a variety of sources, no change. Then suddenly, after about ten minutes, everything seemed to come into focus and they sounded good. Is that normal? They have sounded good ever since. Have had about five hours worth of run-in so far.

I then butchered a small IKEA cushion for some accoustic damping and kerfuffed about with that for a bit. Added tweeters, took tweeters away, added outriggers. Listened with as critical an ear as I could muster.

My conclusion is I prefer:

No internal foam damping
Outriggers with spikes fitted (on carpet)
Tweeters used

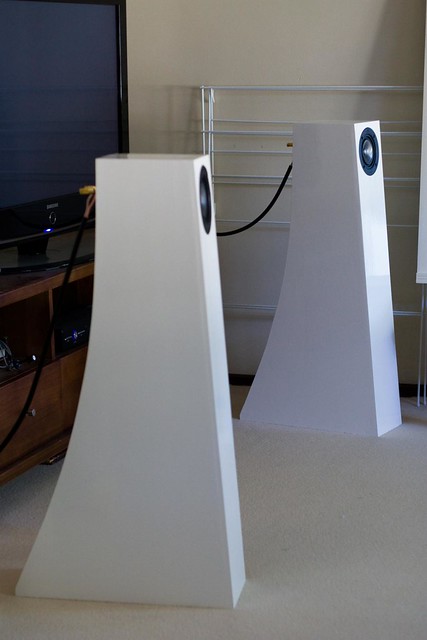
As mentioned in opening post I do rather like the bass, I was warned not to expect a strong bass but it's fine for me, very happy with it. This is perhaps a little surprising as the rear of the cabinets face curtains behind which are a set of glass sliding patio doors. I'm told these things prefer a corner.

Unfortunately placing these speakers in a corner is not an option for me. Where I sit to listen my ears form a triangle with the Frugels of around 2.5M. The tweeters are subtle but I can hear a very definite difference. When I sit on me sofa to listen they are level with my ears, by a stroke of luck.

Overall, I'm really rather pleased, bit of a gamble as these were an unknown quantity for me and the overall cost with flatpack, drivers, tweeters and all the paraphenalia associated with the build was around £350.

Here's some pix, in the first one the bottom panel is not glued, it's there to make attaining 90 degrees simpler.

Image

Image


Image

Image

Image

Image

Image

Image

Image

You can see me teevee in there, that's the one I got from Currys front window at Charlton at the August riots. Wicked, innit? :D

#9

Posted: Fri Nov 11, 2011 8:02 pm
by Mike H
Well done Tony, very nice aren't they? PS like the balcony! :D

#10

Posted: Sat Nov 12, 2011 9:30 am
by Toppsy
Tony,

Good job mate. Sorry about the packing case. No more nails for them, only screws. :wink:

Glad the build and fit of the kit went without hitch.

The original design calls for the sides to be lined in the " felt to just below the driver as well as that shown in the photos. Also some Dacron stuffed in the rear taper where the speaker binding tray is. I also found after a while with the CHP's some dacron placed below the driver helps tame over bass boom and here as you have found the outriggers on carpet help. But the amount of internal damping is personal to how they sound.

The initial poor sound is typical. I find on all my builds they take at least the first hr to bed in the cabinets before they start to sound anything remotely good. Then improve with running in the drivers.

As for painted finishes. Over on DiyAudio DaveD has posted quite a few builds of the FH3 and these two look very nice indeed if you require inspiration for a painted finish:

Image

Image

Image

Image

#11

Posted: Sat Nov 12, 2011 11:31 am
by floppybootstomp
Well.... damn... I'd all but made up my mind to go the varnish route but now I've seen pix of black or white options I'm all undecided again :?

I was going to buy the varnish today as well and just for the occasion treat myself to a nice new brush.

But now - dunno. Time to ponder awhile.

Thanks for the pix Colin.

#12

Posted: Sat Nov 12, 2011 11:36 am
by pre65
My FH3 are MDF and still bare (apart from sanding sealer). The plan was to paint them white, and seeing how those white ones in the photo look so good I might still go that route.

If mine were BBP I would still satin varnish. :)

#13

Posted: Sat Nov 12, 2011 1:45 pm
by shane
Is there any reason why the super-tweeter can't be mounted on the baffle below the main driver?

#14

Posted: Sat Nov 12, 2011 2:00 pm
by Dave the bass
shane wrote:Is there any reason why the super-tweeter can't be mounted on the baffle below the main driver?
Yes. There isn't a hole there?

Arf!

DTB

#15

Posted: Sat Nov 12, 2011 3:43 pm
by Mike H
'e's a card and no mistake :lol: